

Creating a workspace
The first screen after signing up asks for a workspace name and what you do.
Describe your work, and it’s built for you
Section titled “Describe your work, and it’s built for you”Type a sentence — “We run a small design studio: client projects, invoices, and a content calendar.” One sentence is enough. StoryOS (through Tyron) sets up databases that fit, connects them, and adds the views worth having. You can reshape anything afterwards.
- It needs an AI model. On a self-hosted instance without one configured (an
OPENAI_API_KEY), the build can’t run. You’ll see “The build stopped.” with the server’s own message and a Try again that keeps what you typed — and Start from a template instead (below) always works. - When you land in the new workspace, a Share this with your team card appears once, above the getting-started checklist: add several email addresses to invite people, copy a link for each invite, then Done (or skip). Inviting someone ticks the checklist’s “Invite a teammate” step by itself.
Starting from a template instead
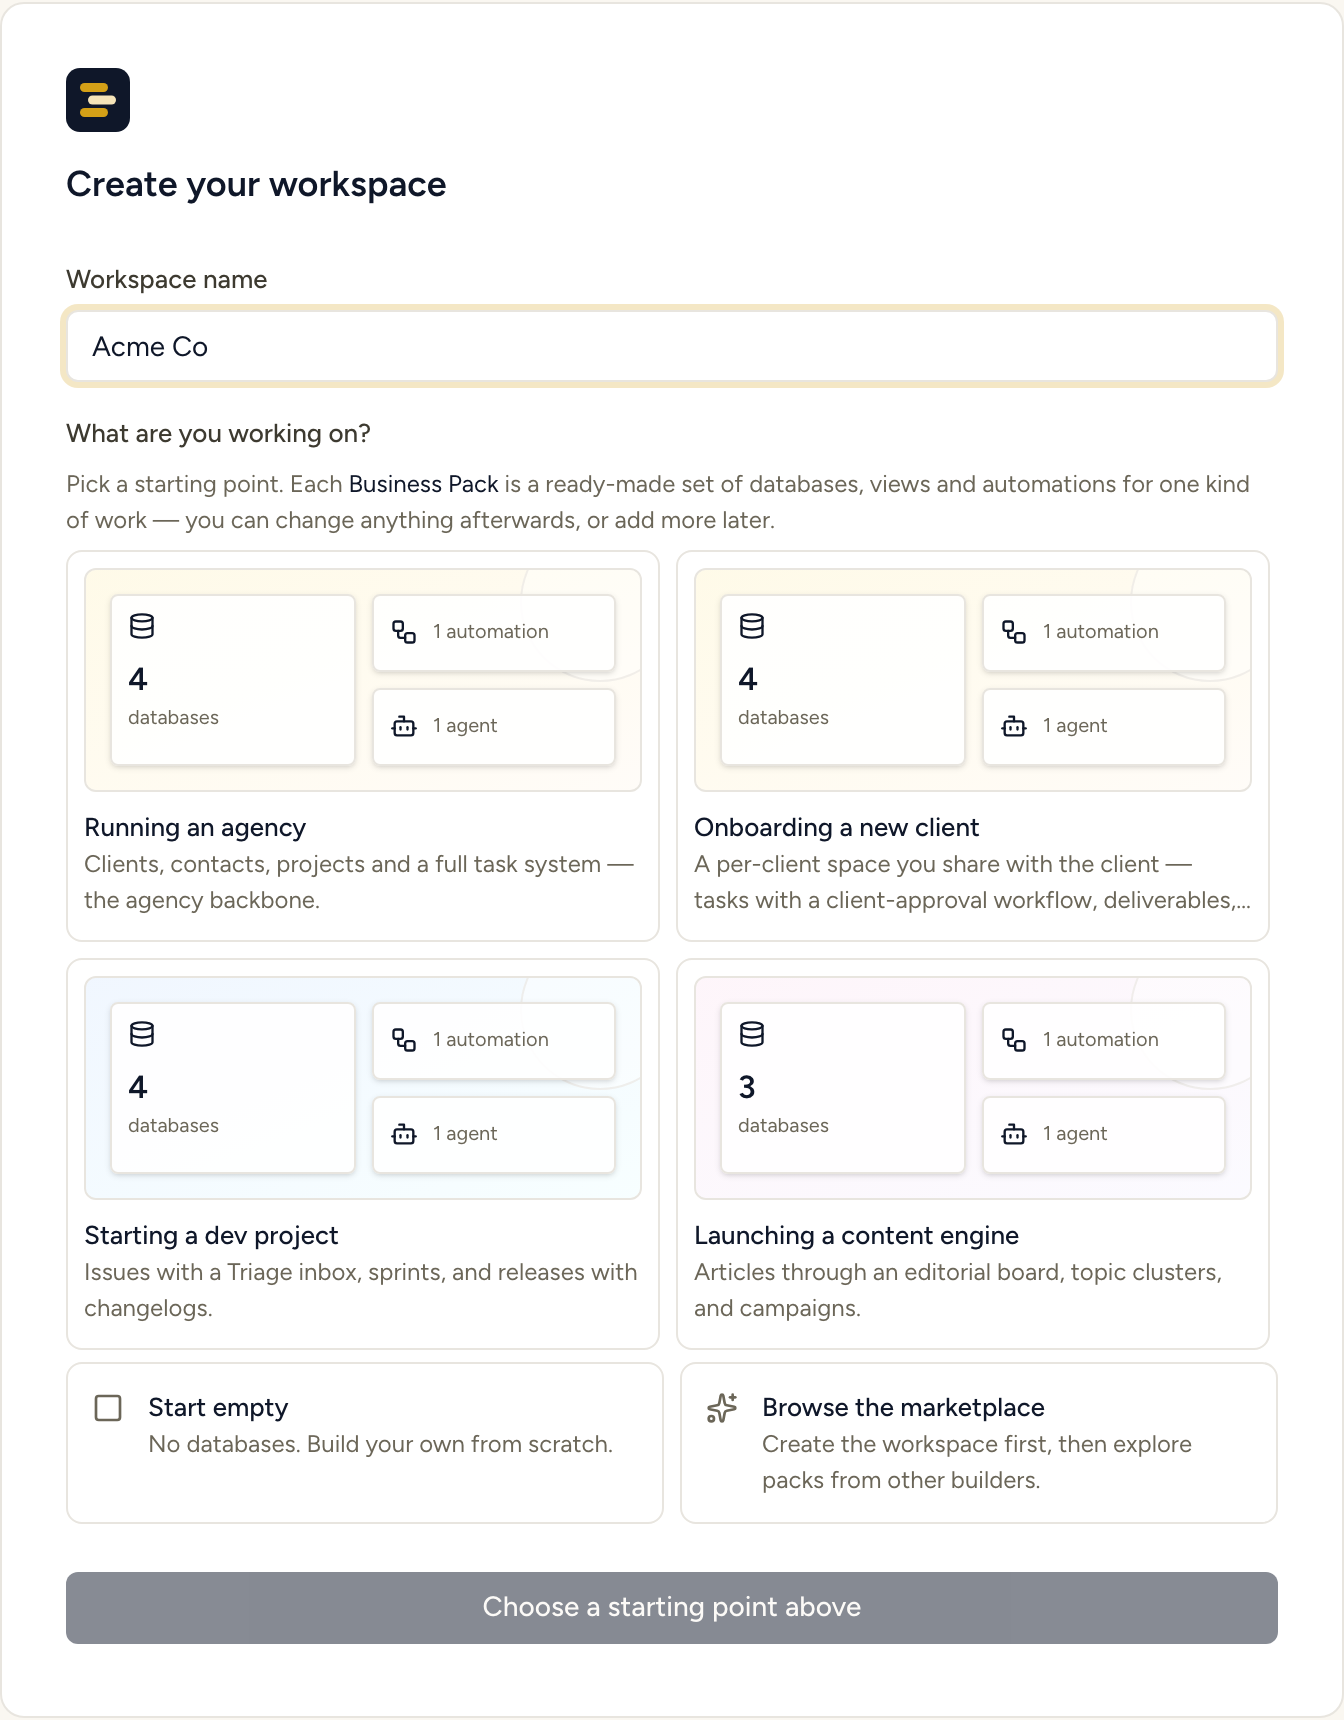
Section titled “Starting from a template instead”Prefer to begin from a known shape? Start from a template instead, under the description box, shows the starting points below; ← Back returns to the describe step.
What you choose from
Section titled “What you choose from”Business Pack is the word StoryOS uses for a ready-made set of databases, views and automations for one kind of work. There are eight, shown as a scrolling grid of cards — every one of them, not a shortlist. You can change anything afterwards, or add more later — from inside an existing workspace, its home page’s Start something new link opens the full gallery of 23 templates (this screen’s eight plus the rest), each card showing a real install count so you can see which ones other workspaces actually use before adding one. A brand-new template with no installs yet simply shows no count, rather than a conspicuous “0.”
Each card’s picture shows the pack’s workflow as a row of status chips (long ones collapse the middle to +N), with marks for a pack that includes an agent or sends notifications. The pack’s counts are one small line underneath.
Two other ways out sit below the grid, and they are deliberately outside the scrolling area so you can see them without scrolling:
- Start empty — no databases. Build your own from scratch.
- Browse the marketplace — create the workspace first, then explore packs from other builders.
Nothing is pre-selected
Section titled “Nothing is pre-selected”The create button stays disabled until you choose, and until then it reads “Choose a starting point above” rather than “Create”. That is the screen telling you it is waiting for you, not that it is broken.
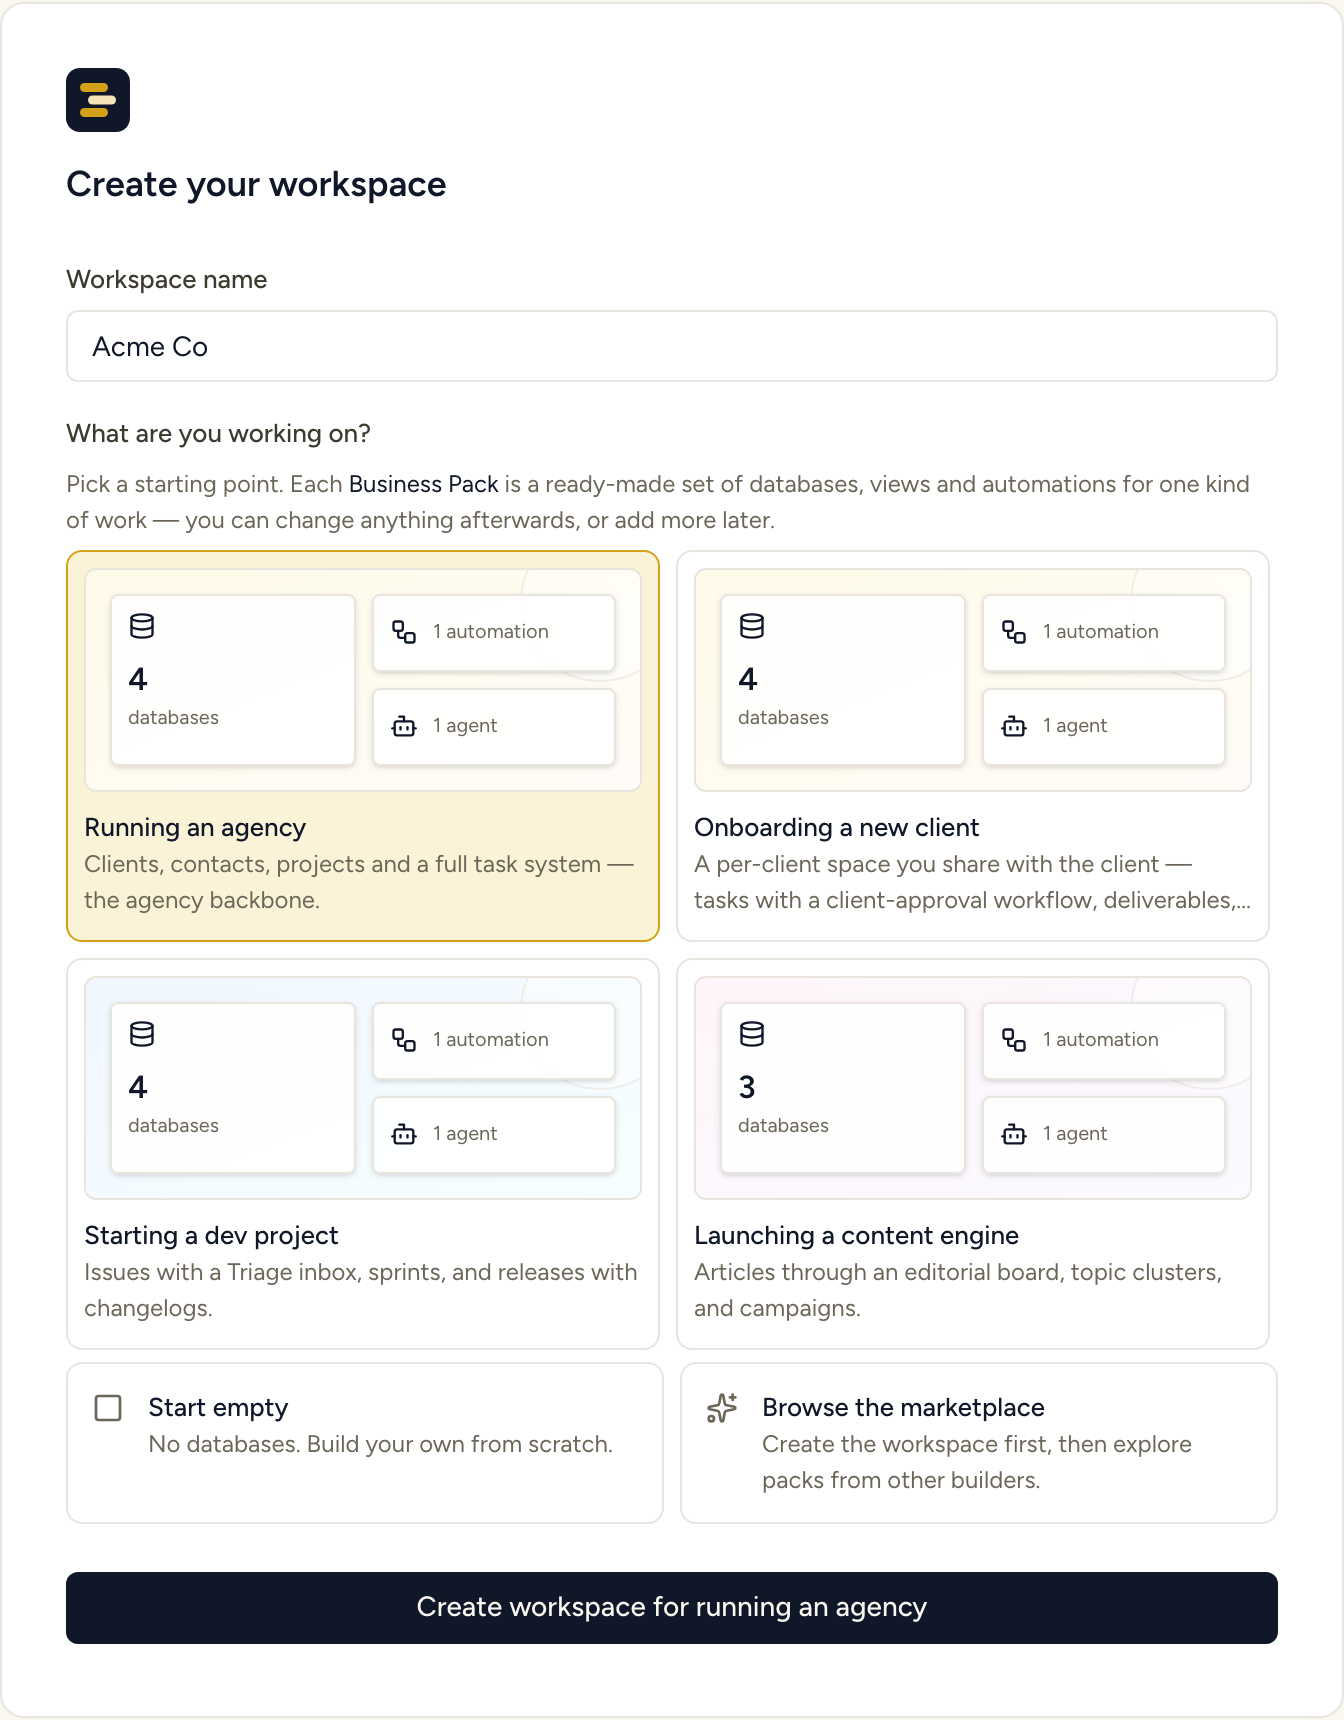
Once you pick, the button names your choice back to you — “Create workspace for running an agency”, or “Create workspace with Support Inbox” — so you confirm what is about to happen rather than pressing a generic Create and finding out afterwards.
If the packs do not load
Section titled “If the packs do not load”The grid shows an error with a Try again button. Creating a workspace with a pack is blocked while packs are unavailable, but Start empty still works — you are not stuck on this screen.
What happens next
Section titled “What happens next”The workspace is created and, if you picked one, the pack’s databases, views and automations are installed into it. Installing a pack is idempotent and additive, so choosing one here does not close any doors.
Installing a second pack that shares a database with one you already have reuses it rather than duplicating it. If the incoming pack’s sample data assumes an option the reused database’s field doesn’t actually have (its own pack never created that option, only the one you already installed did), that one field’s value is skipped and reported — the install still completes, rather than failing outright over a single sample value it can’t carry over.